Everyone wants a car that’s gleaming so bright they can see their reflection, and it is possible. You don’t even need fancy equipment to make it happen. Transforming your dusty, bug-splattered vehicle into a sparkling masterpiece done at home, and while washing your car isn’t rocket science, there’s definitely a method that should be adopted if you want your neighbours do a double-take.
The right approach makes your car look awesome and protects your paint job from the everyday gunk that can cause damage over time.
The importance of a car wash checklist cannot be understated, as it will make sure you have the right supplies and remember the finishing touches that make all the difference. Sometimes, life gets hectic, and dropping your car off for a professional detail makes sense. The pros have tools and techniques that can take things to the next level when you’re short on time or facing stubborn issues. But for regular maintenance? You’ve got this.
What You’ll Need
The following information is the key to transforming a dirty, road-worn vehicle into a gleaming masterpiece that turns heads. While professional detailers work wonders, achieving showroom-quality results with regular washes at home is also possible with the right approach.
This checklist will guide you through every step:
Step-by-Step Car Wash Checklist
Find a shaded spot away from direct sunlight so your soap doesn’t dry too quickly on your paint. Early morning or late afternoon works best, especially on warmer days.
Having everything ready before you begin makes the process smoother and more enjoyable:
-
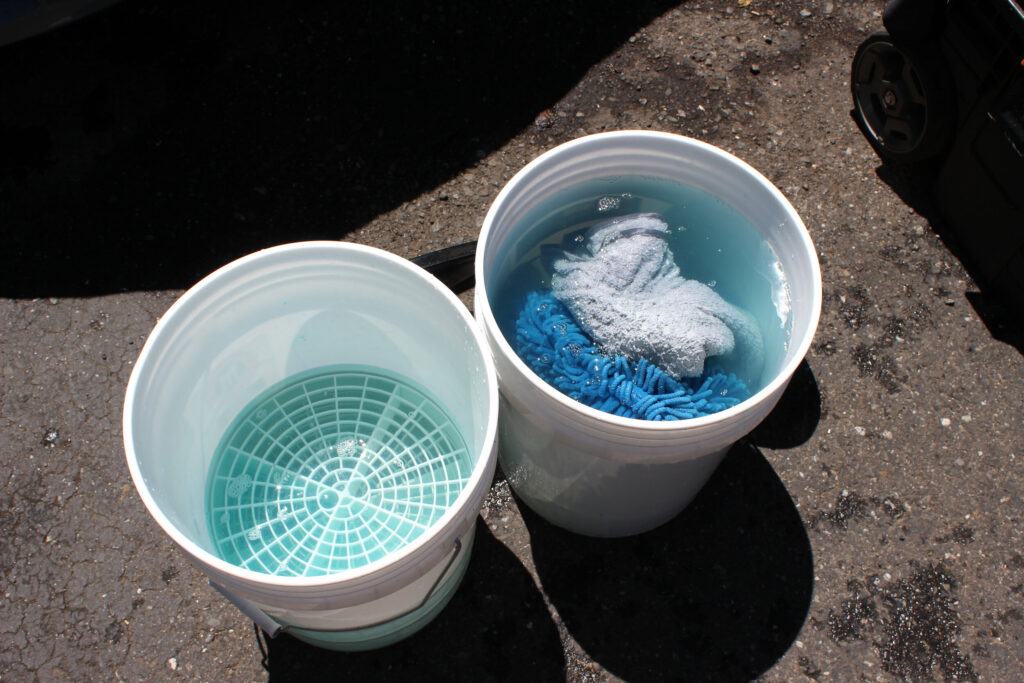
Two buckets (one for soapy water, one for rinsing)
-
Car-specific wash soap (never dish soap!)
-
Several microfiber wash mitts
-
Microfiber drying towels
-
Wheel cleaner and tyre brush
-
Glass cleaner with lint-free cloths
-
Optional: clay bar, wax or sealant, tyre shine
1. Initial Rinse
Start with a good rinse to get rid of the loose dirt, pollen, and any other debris. This crucial first step prevents scratching during the washing process. Use a hose with an adjustable nozzle to reach underneath the vehicle and inside wheel wells where road grime accumulates.
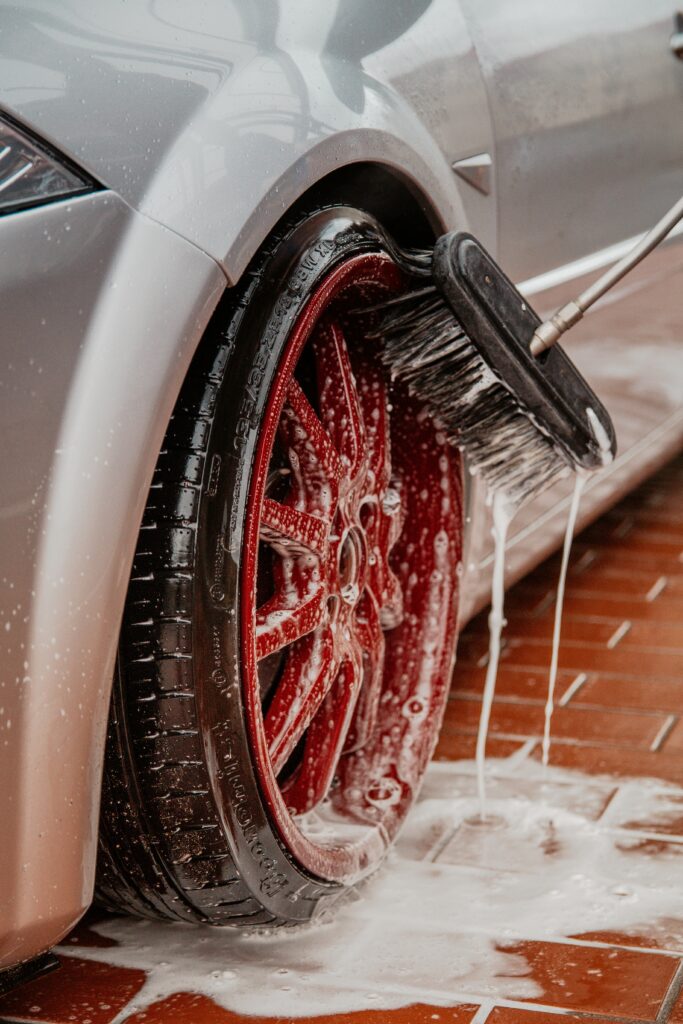
2. Tackle the Wheels
Always clean the wheels before the rest of the car, as they’re typically the dirtiest part:
- Spray each wheel with a specialised wheel cleaner
- Allow the product to dwell for 2-3 minutes (but don’t let it dry)
- Scrub thoroughly with a wheel brush, reaching between spokes
- Rinse completely before moving to the next wheel
3. Contact Washing
This technique prevents redepositing grit onto your paint:
- Fill one bucket with soapy water and the other with clean rinse water
- Dip your mitt in the soap solution, wash a small section
- Rinse the mitt thoroughly in the clean water before reloading with soap
- Work top-down in manageable sections (roof, windows, hood, doors, lower panels)
- Rinse sections frequently to prevent soap from drying
4. Thorough Rinse
After washing, completely rinse your car from top to bottom. Use a gentle, sheeting spray of water rather than a harsh jet. Pay special attention to areas where soap can hide, like door jambs, around badges, and behind bumpers.
5. Drying
Proper drying prevents those frustrating water spots that can etch into your clear coat:
- Start with a light “sheeting” rinse to remove most standing water
- Use plush microfiber towels, working from top to bottom
- Pat dry rather than dragging across the surface
- Consider a drying aid spray for extra protection and shine
6. Glass
Clean, streak-free glass dramatically improves your car’s appearance:
- Use an automotive-specific glass cleaner
- Clean exterior glass in one direction (horizontal) and interior glass in another (vertical) to easily spot streaks
- Don’t forget your side mirrors and rear windows
7. Protection Application
Now that your car is clean, it’s the perfect time to add protection:
- Consider a clay bar if you feel roughness after washing
- Apply a quality wax or sealant in small sections
- Allow to haze before buffing with a clean microfiber cloth
- Pay extra attention to horizontal surfaces that receive the most environmental damage
8. Tire and Trim Care
The finishing details make your detailing job stand out:
- Apply tyre dressing with an applicator pad for a clean, even finish
- Consider a trim restorer for faded plastic components
- Clean exhaust tips with a metal polish if needed
Don’t Have Time For The Above?
While this DIY approach delivers excellent results, don’t hesitate to seek professional help for deep correction, ceramic coatings, or when time is limited. Professional detailers have specialised equipment and products that can take your car’s appearance to the next level when needed.
No matter which option you choose, the goal is to achieve that enviable shine while protecting your vehicle’s finish for years to come. Consistent care is the real secret to maintaining your car’s appearance!
*Looking for a quick, professional option? Find a car wash near me to get that showroom shine without the effort.